
Set-up is everything!
Cavaletti (actually the plural of cavaletto!) come from the equine world where they were used to perfect gaits and exercise horses. Think football players high stepping through tires – coach will tell you it’s about speed and power, flexibility and range and motion and of course cardiovascular conditioning. Cavaletti are commercially available or easily made at home with cones and pipe or garden canes. The cone spacing, and the bar height are all variable depending upon the goal of the session. A simple straight ladder can also be used in lieu of the cones; however, it is not as adjustable and versatile.
Key Elements:
The Process
Cavaletti can either be purchased or made relatively simply, a nice number of cavaletti poles is between 8 and 12. Begin by laying the poles out on the ground. The distance between the poles should be the height of the dog at the shoulder.
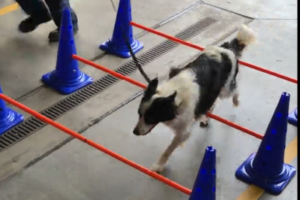
To begin with keep the poles on the ground until the dog is walking across them without stepping on them. You can either use a target at the far end or place the dog on a leash and walk them through the course. Speed is not always the best solution, we are looking for the dog to engage muscles and understand the range of motion for all 4 of its paws, so slow and controlled is definitely better.
Once you are ready to move the poles up make sure you do not start higher than the dogs carpus – ankle joint. for most dogs this means starting with poles around 2″ off the ground. Maintain this pole height until the dog is repeatedly going through the course under control and placing one foot in each space at a time, clearing the poles with the traveling feet.
To increase intensity the poles can be raised and the number of reps increased. As an advanced skill the poles can be placed at angles both in height and across the course. The dog has to visualize the obstacle, negotiate it with all 4 fours and repeat for each of the pole sets.
Be mindful that this is an intense workout and to work up to the advanced levels over a couple of weeks. Always start with a low, level straight pole warm-up.

Progression Example:
Level 1 – Poles on ground–stepping over them, one foot placed between poles
Level 2 – Poles at lowest starting level–stepping over them, under control
Level 3 – Raise poles by 1”(or to next set of holes)
Level 4 – Poles at max heights–height dog can negotiate without knocking over the poles
Level 5 – Lower the poles to mid-height for dog and space them slightly closer
Level 6 – Lower the poles to mid-height for dog and space them further apart
Level 7 – Place poles at different heights within range for dog
Level 8 – Place poles at different angles–not parallel
Level 9 – Place poles at different heights and angles